

Starting up your own eCommerce business can be stressful, and choosing the right platform for your online store can be very confusing. However, it doesn’t need to be.
In this article, we will discuss the pros and cons of using Shopify to create a successful eCommerce shop. We will then look step-by-step at how to set up an eCommerce store with Shopify. By the end of reading, you will have a good understanding of whether Shopify is right for your business venture, and if so, how to get started with it.
Shopify: The Pros

Shopify is an all-in-one hosted eCommerce solution, that will help you set up and manage your online store. Let’s take a look at its top features…
- Quick and easy set up.
- Provides numerous well-designed and customizable themes.
- Hosting, security, site performance, and website maintenance are all taken care of for you.
- Contains all the necessary features an eCommerce store needs.
- Essential SEO and marketing tools are provided.
- Offers a wide assortment of add-ons that provide advanced functionality.
- Extensive 24/7 support.
As you can see, Shopify has a range of impressive features making it a great choice for anyone looking to set up an eCommerce store. However, what about the cons?
Shopify: The Cons
As with any platform or solution, alongside its many pros, Shopify does have a number of cons. Let’s take a look…
- Pricing – Using Shopify, you will be charged a monthly payment as well as fees for every transaction.
- Control and Ownership – As Shopify is a hosted solution, you have very little control and ownership over your website, which some people may find a problem.
- Customization of Design – Again, Shopify is limited as to its customization options over the design of online store when compared to software like WordPress. This can be frustrating for those who want full control over the appearance and usability of their eCommerce shop.
So now we know a bit about what Shopify offers, as well as its drawbacks, let’s have a closer look at how to use it to set up an eCommerce store…
Step One: Sign Up With Shopify
To get started, you will first need to sign up with Shopify. To do this, simply select Get Started, found at the top right-hand corner of the Shopify homepage.

Shopify offers a 14-day free trial, so you can set up an eCommerce store, gain experience of using Shopify, and generally see if it is the solution for you, before you pay a penny.
During the sign-up process, you will need to tell Shopify a little about your store and fill out some personal information including address and contact details. Once complete you are ready to start setting up your shop.
Step Two: Add Your Products
Shopify is extremely user-friendly and will walk you through each step of the set-up process. Therefore, adding your first product, and numerous products after that, is very quick and easy.

On your dashboard homepage, simply select Add Product. You will then need to fill out the product details. These include…
- Product Title
- Description
- Price
- Inventory and Shipping Info
Here you can also upload images of your product that will be displayed to your potential customers. Once you have finished, click on Save Product at the bottom of the page. You can then go ahead and add all further products that you want to sell on your Shopify store.
Step Three: Select a Theme
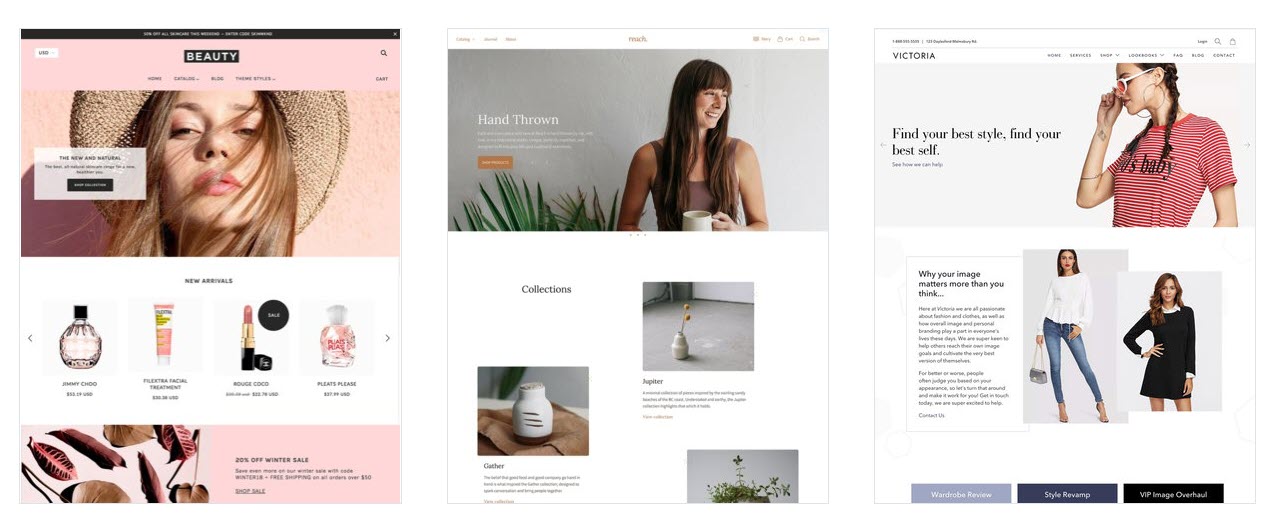
Back on your Shopify dashboard’s homepage, your next job is to choose an appropriate theme for your store. It is always better to do this after you have added your products, so you get a clear idea of how your shop will look with your products in it.
Click on Customize Theme. Then, on the Themes page, scroll down and either select Explore Free Themes or, if you’d rather opt for a premium theme, Visit Theme Store. Premium themes can range in price, but will generally cost you around the $160 mark.
Once you have chosen your theme, you will need to add some info to help improve your online store’s performance. This includes…
- SEO – Add your homepage title and meta description to help your store rank in the search engines.
- Google Analytics – Sign up with Google Analytics and add your tracking code so you can track how your visitors behave on your site.
- Facebook Pixel – If you want to create Facebook ad campaigns, then you will need to paste your pixel code here. This will enable Facebook to identify your visitors and remarket to them on Facebook.
Select Save at the bottom of the page. Your shop theme is now ready to customize.
Step Four: Customize Your Theme

Switch back to your Themes page (which can be found under Online Store > Theme in the left-hand side menu). Then select Customize. You can now customize the appearance of your site and add a range of features. These include…
- Displaying a Logo and Header Image
- Using an Announcement Bar
- Creating a Slideshow
- Changing the Text, Typography, and Colors.
- Altering the Product Page Layout
Depending on the theme you choose, these options will vary, but even the free themes come with a wide assortment of customization possibilities. Once you are happy with the appearance of your theme, select Save in the top right corner of the Editor and then return to your Shopify dashboard.
Step Five: Add a Domain
Shopify will provide their own subdomain for your store, which will look something like this… ‘yourstorename’.myshopify.com. So, to help your store appear reputable, it is best to use your own domain.

Select Add Domain and then choose from one of three options…
- Connect an Existing Domain
- Transfer a Domain
- Buy a Domain
Try and choose a domain name that is relevant to your store, but is also catchy and easy for your customers to remember.
Step Six: Activate Payment Gateways
Out of the box, Shopify supports Shopify Payments and PayPal Express Checkout. Simply complete the account set up with both payment gateways to start taking payments on your eCommerce store.
Other third-party payment gateways that Shopify also supports include Stripe, Authorize.Net, 2Checkout, Amazon Payments, and many more. This enables you to set up payment gateways that work for you and your customers.
Step Seven: Go Live
There is still a wide variety of other settings, features, and apps that you can activate and configure. But, if you have followed the first six steps mentioned above, then you should now have a basic Shopify store ready to launch.

To do so, if you haven’t already, you will now need to sign up to one of Shopify’s payment plans. These start from as little $29 a month, which is well worth the money if the Shopify platform suits your needs.
Final Thoughts on How to Set Up an eCommerce Store with Shopify
Evidently, Shopify is an impressive solution, but it isn’t for everyone. Think carefully about your eCommerce store needs, your budget, and your web design experience. Then weigh up whether Shopify is the solution to cater for those needs.
If you decide to opt for Shopify, its extremely user-friendly editor, combined with one of its stunning and customizable themes, will ensure you soon have an eCommerce store to be proud of. Ready to get started?
Have you got any questions about using Shopify? If so, please ask away in the comments below…


Great article for anyone interested in starting an eCommerce business. Thanks